
Bright, tangy pink lemon bars
These Hibiscus Lemon Bars are a dreamy pink dessert with bold lemon flavor and a delicate berry-like hibiscus twist. They are perfect for spring parties, bridal showers, brunch tables, or anytime you want a bright Pinterest-worthy dessert that feels special without being complicated.
- Prep: 20 mins
- Cook: 35 mins
- Total: 55 mins
- Servings: 16 bars
Ingredients
- 1/2 cup unsalted butter, softened
- 1/4 cup granulated sugar
- 1 cup all-purpose flour
- 1 pinch salt
- 1 tsp vanilla bean paste
- 1/2 cup fresh lemon juice
- 1 tbsp dried hibiscus or hibiscus tea
- 3 large eggs
- 1 1/2 cups granulated sugar
- 1/2 cup all-purpose flour
- Confectioners’ sugar, for garnish
Kitchen Tools
- 9×9-inch baking pan
- Parchment paper
- Mixing bowls
- Whisk
- Fine mesh strainer
- Spatula
Step-by-Step Instructions
- Prep: Preheat oven to 350°F. Line a 9×9-inch pan with parchment paper for easy lifting
- Make crust: Cream butter, sugar, and vanilla. Mix in flour and salt until a soft dough forms. Press evenly into the pan.
- Bake crust: Chill crust for 15 minutes, then bake for 15 minutes until lightly golden.
- Infuse lemon: Stir hibiscus into lemon juice and let steep for 15 minutes. Strain and discard hibiscus.
- Make filling: Whisk eggs and sugar, then add hibiscus lemon juice and flour until smooth.
- Bake: Pour filling over crust and bake 20–25 minutes, until set in the center.
- Finish: Cool completely, chill for neat slices, then dust with confectioners’ sugar

Pro Tips
- Storage: Keep bars refrigerated in an airtight container for up to 4 days.
- Subs: Use Meyer lemons for a softer flavor or regular lemons for a sharper tang.
- Meal Prep: Bake one day ahead and dust with sugar right before serving.
- Serving: Pair with tea, coffee, brunch fruit, or a simple dessert platter.
Main Body
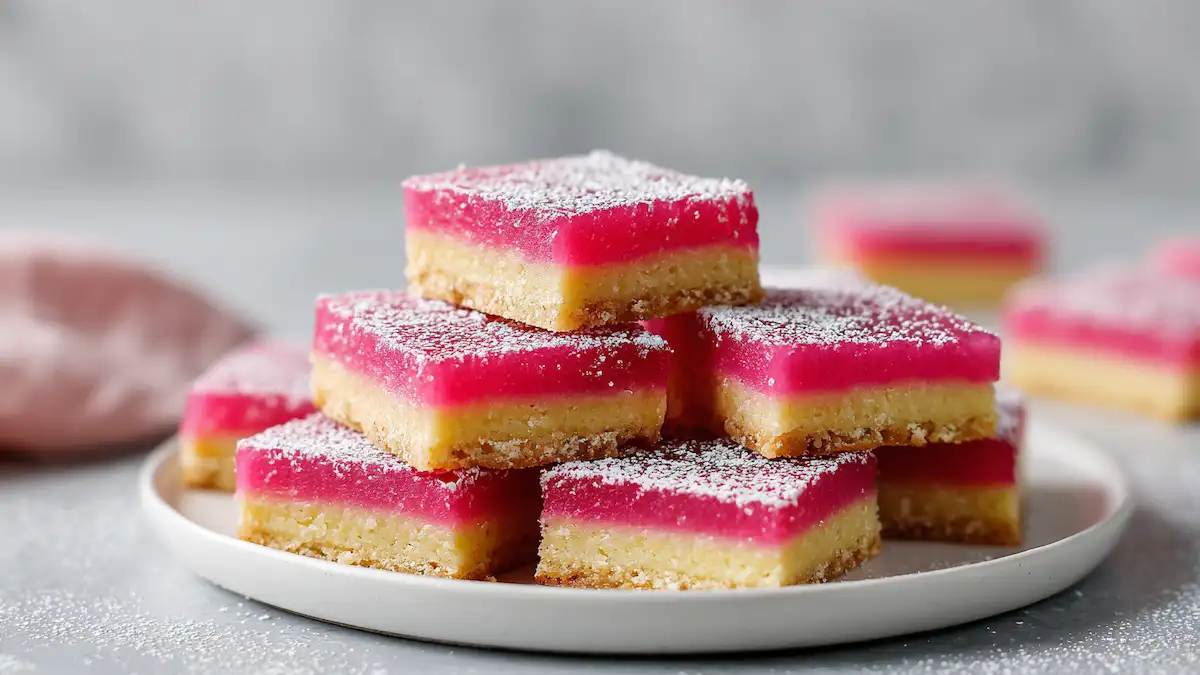
Hibiscus Lemon Bars are everything a lemon dessert should be: tart, buttery, silky, and fresh. The hibiscus adds a beautiful rosy color and a gentle berry-floral note without making the bars overly sweet. They look elegant on a dessert tray but still have the cozy, homemade charm of classic lemon bars.
The key technique is steeping dried hibiscus directly in fresh lemon juice. This gives the filling its pink color and light fruity flavor while keeping the lemon flavor strong. Avoid over-steeping for too long, because hibiscus can become too herbal. Fifteen minutes is enough for color, aroma, and balance.
The crust is simple but important. Softened butter, sugar, flour, salt, and vanilla create a tender shortbread base that supports the creamy filling. Press it firmly and evenly into the pan so every slice has the same buttery bite. A quick chill before baking helps the crust stay neat and prevents it from puffing too much.
For the cleanest bars, let them cool fully before slicing. Chilling makes the filling firm enough for sharp edges, especially if you plan to serve them at a party or photograph them for Pinterest. Dusting with confectioners’ sugar right before serving gives them that classic bakery-style finish.
These bars are ideal for make-ahead dessert planning. Bake them the night before, refrigerate, and slice just before serving. The flavor becomes even brighter after chilling, making them a low-stress choice for brunches, showers, holidays, and sunny weekend baking.
Variation Recipes
- Meyer Hibiscus Lemon Bars: Use Meyer lemon juice for a sweeter, floral citrus flavor with less sharpness.
- Hibiscus Lime Bars: Swap lemon juice for fresh lime juice for a bold tropical twist.
- Berry Hibiscus Bars: Add a thin layer of raspberry jam over the crust before pouring in the filling.
Conclusion
These Hibiscus Lemon Bars are bright, tangy, pretty, and easy to love. Save this dessert for your next brunch, spring gathering, or afternoon baking treat.
Nutrition (Estimated)
| Serving | Calories | Protein | Carbs | Fat | Fiber | Sugar |
|---|---|---|---|---|---|---|
| 1 bar | 198 | 2g | 33g | 7g | 0.3g | 24g |
Disclaimer: Estimates vary by ingredients and tools.