
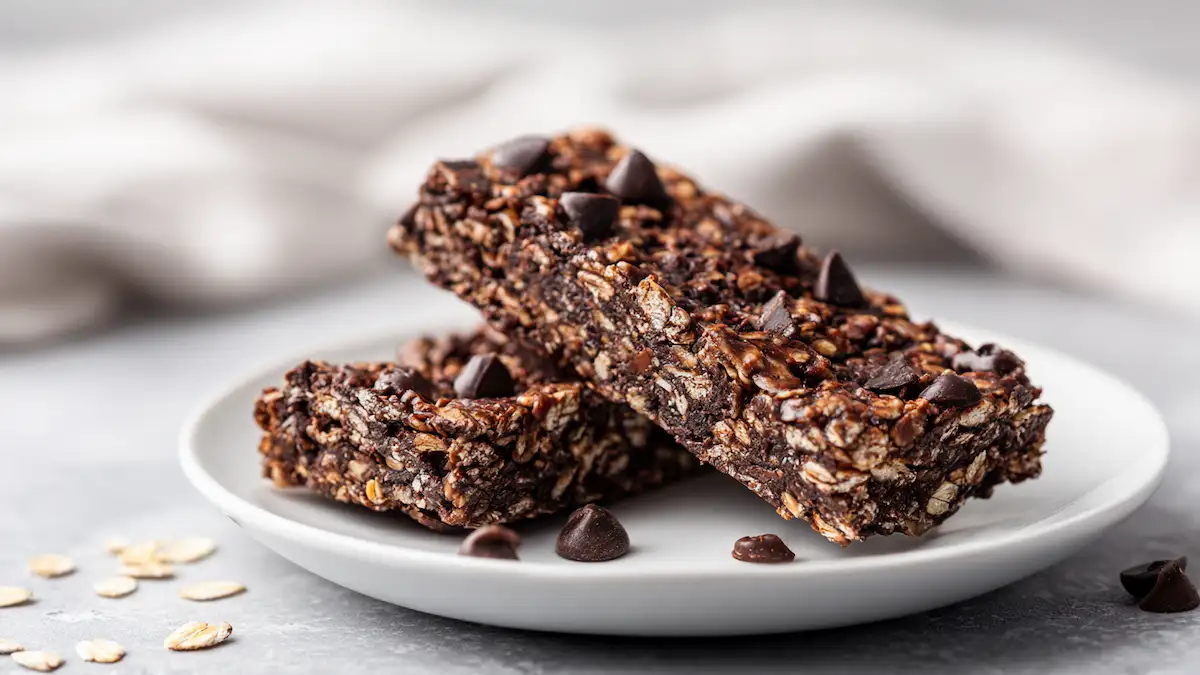
Healthy-ish, fudgy, snackable chocolate
These Dark Chocolate Brownie Granola Bars hit that perfect “little healthy, little indulgent” sweet spot: deeply chocolatey like a brownie, but built on wholesome granola-bar ingredients. They’re naturally dairy-free, egg-free, and gluten-free, and you can bake them soft or leave them a bit longer for a crunchier bite. Think: cocoa-rich oats, coconut, almonds, and a glossy syrup that binds everything together then a generous handful of bittersweet chocolate chips for that bakery-style finish. They’re ideal for lunchboxes, after-school snacks, and “I need chocolate now” moments, and they slice beautifully once cooled for neat, portable bars.
- Prep: 20 mins
- Cook: 20–25 mins
- Total: 45 mins
- Servings: 24 bars (9×13 pan)
Ingredients
- 2 1/2 cups gluten-free rolled oats
- 1 cup unsweetened shredded coconut
- 1/2 cup almond flour
- 1/2 cup unsweetened cocoa powder (dark cocoa if you want it extra rich)
- 1 cup sliced almonds (or chopped almonds)
- 1/2 cup bittersweet chocolate chips (plus extra on top, optional)
- 1/3 cup coconut oil, melted
- 1/2 cup packed brown sugar
- 1/3 cup honey (or maple syrup for a vegan-friendly option)
- 1 tsp vanilla extract
- 1/2 tsp fine salt
Kitchen Tools
- 9×13-inch baking pan
- Parchment paper
- Large mixing bowl
- Small saucepan (or microwave-safe bowl)
- Measuring cups & spoons
- Spatula or wooden spoon
- Bench scraper or sharp knife (for clean slicing)
Step-by-Step Instructions
- Prep: Heat oven to 350°F / 175°C. Line a 9×13 pan with parchment (leave overhang for lifting). Mix dry ingredients in a large bowl: oats, coconut, almond flour, cocoa powder, almonds.
- Make syrup: In a small saucepan over low heat, melt coconut oil, then stir in brown sugar, honey, salt, and vanilla. Cook just until glossy and smooth no need to boil.
- Combine: Pour syrup over the dry mix. Stir until everything looks evenly coated and “granola-like” (not brownie batter). Fold in chocolate chips last.
- Press: Spread mixture into the lined pan. Press gently but firmly into an even layer tight enough to hold together, not smashed to dust.
- Bake: For softer bars, bake 16–17 min. For crunchier bars, bake 23–25 min. A balanced texture sweet spot is often ~20 min.
- Cool & cut: Cool completely in the pan (this helps them set and slice cleanly). Lift out using parchment, then cut into 24 rectangles or squares.
")
Pro Tips
- Storage: Store airtight at room temp for 3–4 days, or refrigerate up to 7 days. Freeze up to 2 months.
- Subs: No almond flour? Use equal oat flour (blend oats until fine). Swap almonds for pecans, walnuts, or pumpkin seeds.
- Meal Prep: Bake once, cool fully, slice, then freeze bars individually for grab-and-go snacks.
- Serving: Great with coffee, tucked into lunchboxes, or crumbled over yogurt for “brownie granola.”
Main Body
What makes these bars special is the way they land right between treat and snack. They deliver that deep brownie flavor thanks to cocoa powder and bittersweet chips, but the base is classic granola-bar territory: oats, coconut, and nuts. The result is chocolate-forward without being heavy, and the bar format makes them easy to pack and portion perfect when you want something sweet that still feels “reasonable.”
The key technique is the simple syrup that binds everything together. You’re not making caramel just warming coconut oil, brown sugar, honey, vanilla, and salt until glossy. That syrup coats every oat and almond, and as it bakes, it sets the bars so they slice cleanly. The most common mistake is under-pressing the mixture in the pan. If it’s too loose, the bars crumble; if it’s overly compacted, they can become tough. Aim for a firm, even press think “snug granola,” not “cement.”
Almond flour is the quiet hero here. It adds structure that helps the bars hold like a brownie rather than falling into chunky gaps. It also contributes a soft, tender bite that plays beautifully with the crunch of oats and nuts. If you need a nut-free option, oat flour works well just blend oats until finely ground. Either way, that flour piece is what turns this from “chocolate granola” into “brownie granola bars.”
Texture is completely in your hands. Pull them at 16–17 minutes and you’ll get a softer bar that still has granola vibes. Bake closer to 23–25 minutes and the edges go crisp, giving you a more snacky crunch. Remember they firm up as they cool, so don’t judge straight from the oven. If you love that “in-between” texture slightly crunchy but not hard 20 minutes is a solid target in most ovens.
These are also forgiving in the best way: if your batch turns out crunchier than planned, crumble it and call it “double-chocolate granola.” Sprinkle it over yogurt, fruit, smoothie bowls, or ice cream. For neat slices, let the pan cool completely before cutting so the chocolate chips don’t smear. Want extra clean edges? Chill the slab for 20 minutes before slicing, then cut with a bench scraper or a sharp chef’s knife.
Variation Recipes
- Salted Dark Chocolate Crunch: Sprinkle flaky salt on top right after baking for a bakery-style finish and deeper chocolate flavor.
- Peanut Butter Brownie Bars: Swap 2 tbsp of the coconut oil for 2 tbsp peanut butter (or sunflower seed butter) for a richer, nutty bite.
- Mocha Granola Bars: Add 1–2 tsp instant espresso powder to the dry mix for a subtle coffee-chocolate boost.
Conclusion
If you want a snack that feels like a treat without going full dessert, these dark chocolate brownie granola bars are the answer. Bake them soft, bake them crunchy, slice them into bars or squares there’s no wrong way. Save this recipe for busy weeks, chocolate cravings, and lunchbox wins, and don’t forget: any “too crunchy” batch becomes the best chocolate granola topping ever.
Nutrition (Estimated)
| Serving | Calories | Protein | Carbs | Fat | Fiber | Sugar |
|---|---|---|---|---|---|---|
| 1 bar | 190 | 4g | 22g | 10g | 3g | 10g |
Disclaimer: Estimates vary by ingredients and tools.